Thursday 30 September 2010

Monday in the Print Room

I was looking forward to going in the print room, as I'd done some printing at my evening classes. They didn't let us loose on the big presses (yet!) but we used lots of old wood block letters, which are so beautiful to use, really chunky and tactile. The lovely noise the ink makes as you roller it is good too!

This was my first image. I love the E stamp!

I used blue ink with the same letters over this advert from Glamour magazine. I love the freshness of this image.
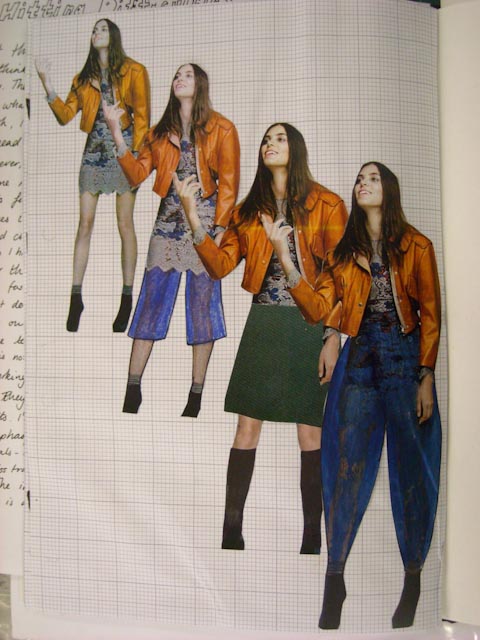
Using letters to cover up this model worked well.
I also used the same letters to create some people, but I'm going to do some more work on those and will post that later!

I used a page from 'Captivating' one of my all time favourite books, which is all about womanly beauty and the Christian life as the background for this. I love the little letters which our tutor got in Early Learning!
The next three images are about the labels our clothes give us. We wear designer labels, or fairtrade cotton or our favourite shop, but what we wear also influences what people think about us. I know in our post-modern world that that is not a popular thing to say, but it's true otherwise why would people buy fashion magazines and have face lifts? So if you are dressed immodestly what does it say about you? The bible verses often quoted about women's hair etc were written by Paul to the Corithians who were living in a city with temples to Greek gods, were temple prostitutes were used. Paul gave his instructions so the Christian Corithians could distinguish themselves from the temple prostitutes who had short hair (women) and long hair (men) and dressed in particular ways. So Paul was saying don't dress like a prostitute or you could be mistaken for one. That seems sensible advice and still applicable. So what labels do we wear? Cheap, easy, frumpy even?
This came out gorier than I wanted because of the red ink!

Taken after I'd done the image above. Again a bit gory!

Much better! I think the blue has more impact, and I like the way the writing obscures her face.
 

There are a load more things to post but I haven't taken pictures of them all yet. There are so many ideas now and I feel the project is finally beginning to say what I want it to say. I want to do some text experiements and some fashion drawings of my own now!

Change of Direction

First of three posts to try and catch up with where I'm at with the project! As my last post showed I was really struggling with my theme and where I was headed. After bending Adrian's ear about it for most of Saturday, and then feeling inspired by Brighton's win at home (Had to put that in because I'm just not used to it yet!) I worked until 10pm on the following ideas. Instead of looking at Amish fashion, which is not really what I believe is necessary to be modest, how about altering images from fashion magazines to make them more modest? So I bought a copy of Glamour and then found some images to work on. Perhaps it's because it's Autumn but there was less to work on than I expected! I used some of the techniques from last week - tracing paper, drawing on top of an image, and using acetate.

This is the first experiement. I used pen to give the girl on the right a longer skirt. The girl on the left is what I would consider to be modestly dressed anyway!
So after the initial experiement I got busy with the photocopier (thank goodness we've got a multi function printer here at home!) and produced the following images. I decided to stick them on squared paper as I wanted a designed look to them.

Advert for Topshop with 2 alternative suggestions

 This was a good image as there were lots of possibilities, despite the odd pose of the model

She looks a bit dumpy but I think the idea works ok.

 I had to work hard on this one, and the stripes were needed to disguise the belly button!

Another good image as it allowed for lots of possibilities.
Finally I feel like the project is heading where I want it to. It's relevant, fashionable and saying something. I couldn't wait for Monday to start working with text and trying out some stuff in the print room!

Wednesday 22 September 2010

Thinking too much!

I've been thinking really hard about how I did this week and where next. I'm a little unclear as to the final outcome of the project, and have sought some clarification from my tutor. My main feeling at the moment is that the images aren't conveying fully the message I want to convey - and then I got thinking, what is the message I'm trying to convey? I guess it's about modern modesty, about bucking the current trend for dressing like a porn star. Having grown up in the 'eighties when the feminist movement was still so strong, it seems like such a backward step that some women dress the way they do, seeming to have little self respect and dignity. I probably sound really old fashioned now, but I think words like modesty, respect, dignity and femininity are really important, and I guess that's what I'm really trying to say in my project. It's not about being frumpy or unfashionable, it's about following the suggestion Paul made to the Corinthians of not looking like a prostitute, which seems sensible advice to me!
For me expressing an opinion is a risky business. I am trying very hard to ditch my people pleasing tendancies, because if I am going to be an artist, I need to learn to express myself in regard to my work, and if I want my work to reflect me, then I need to be prepared to take the responses both positive and negative, to weigh them, and give them the attention that is necessary for me to develop. Thankfully I've got God working on the inside, so it's not all down to me!

Tuesday 21 September 2010

Book Work - Images only

Our first project, which is the graphic design and visual communication element of our course, has the title bookwork, and one of the end components will be a 'book' in the loosest translation. We had various themes to choose from and I've chosen fashion. I decided to concentrate on modesty - Amish clothes, Quaker clothes and modern Christian women who dress in a modest fashion. (Once you start looking at this on the Internet you will discover there is a big difference between 'Modest' and 'modest'!) I was surprised at how much my faith influences what I wear, and I want to try and combine all these ideas together. Nothing like setting your self a challenge! I've been a bit concerned about how to do this, and I spent a lot of time over the weekend thinking about what I think and believe about this, because I think art should reflect the things that are important to you. I've been quite challenged today by some of the things that the others are doing - tattoos, genital mutilation (anti - not pro!) and some of the images they are using as research. It is so completely the opposite of my project, which is seeking to think about beauty in a very different way.

So what have I been working on? Here are some of my pieces with short comments.


We started by cutting out silhouette shapes to get a positive and a negative. We then used these to make photo montages and collages. I used Amish quilts, and CD and book covers for this image.

As you can see this is a negative from the above image, combined with a CD cover. I did more with this image later.


This is the image above, photocopied and overlaid with an acetate on which I drew some other images. I used a photocopy of some plain fabric as my border. Although my tutor thought this was too busy I really like it, because the project is not just about Amish simplicity but also about modern modesty.

A bit of a head covering theme going on here - I've included Amish, Quaker and Catholic images here, on a quilt background with a modern CD cover too.


For this image I used tissue paper to give the skirt a 3D feel, to emphasize the gathers. I used acetate again, and coloured the paper underneath. The background is more copied fabric.

Another tissue skirt. I think I prefer this one to the one above. I love the background quilt and the rich pink and burgundy colours. Vicky Beeching also has such a lovely smile. If you don't know here music - she's a fantastic Christian artist, with an amazing voice and very cool hair!

I took this photo to help me see if this composition would work. I've included a t - shirt of a longer length which is my choice of modest clothing as it stays tucked in and doesn't reveal items of clothing I would rather not have on display!
It's been a challenge working just with images, and I'm not sure it's saying what I want it to say, but then when you've been working on something sometimes you need to take a step back and look at it after  break. I love the colour palette that I've got going on, especially the blues and burgundys. Next week we work with text so I'll see what happens then!

Finishing off.

Before getting too involved with our first project, I wanted to finish the drawing work I'd been doing - the shell, pinecone and bottle piece. I spent some more time collaging on the pine cone photocopies and then added more detail to the shell. I like the shell the least. I think it doesn't have enough depth or tone really, but it was good to try a different technique. I think because it's so new to me, it's hard to know how to resolve any problems. So here are the photos of the finished piece. I really love the pine cones and the bottle, probably because they're pencil and pastel respectively!
The whole picture. A good experiement to try.

Detail of the shell
All three components in detail. They do all look very different.

Tuesday 14 September 2010

Co-operative art

Today we worked with the year 2 students on a co-operative project. We all chose a colour or black and white image to copy, not knowing that they were in fact all related and would be brought together to form 2 giant pictures!

This is my first section. I thought it was a landscape. I recognised it as a Van Gogh, but not as Van Gogh! It is of course part of one of his self portraits. (mine is the one at the top!)
 

Now I get it! I hadn't even realised that my two pieces joined together! Thankfully we got to see the big picture when everything was put together.

There were two versions of this picture. I am responsible for the left hand portion of Van Gogh's beard. I think it's so amazing how it all fits well together, and I love that the different artist's techniques show through.

Unfinished but still brilliant! We used the 'original' for the top left hand piece. I am responsible for the bottom left hand piece of jacket and neck. Again it all fits so well together.
I actually went in to college a bit early this morning to try and finish the bottle, shell, pinecone piece. As yet it is unfinished, but I'm off to do that now, and will try and get it posted over the next couple of days.

Monday 13 September 2010

Week 2 - more drawing!

Today was about combining some of the techniques we'd tried last week. First we had to pick three objects - I chose a brown glass bottle, a scallop shell and a pine cone. Then we had to find techniques suitable for each object, matching it's texture etc.
Bottle base, using soft pastels
 Ok, so I stayed well within my comfort zone here. I love using pastels and charcoal, and it's just so fantastic for the smooth and reflective surface of the bottle. Lifting out creates those highlights so well, and it's very messy!

The big picture!
The paper I'm using is A1 - apart from using the 6 foot long stuff in church, for painting during worship, this is the largest paper I've ever used. The bottle base is on the left, and the brown paper on the right is in preparation for the shell, which I decided to do using stippling.

Shell close up
As you can see I didn't just use stippling. After looking more closely at the shell, I noticed it was more linear than I'd first thought, so I used a Sharpie marker to create the lines. I added the stippling to create some depth. To me it all feel a bit scribbly and I'm not sure how well it sits with the very soft and smudgy bottle  base.
Bottle and shell together
Here you can see the bottle and the shell together. I think they both work well on their own but I'm not sure about the two combined. I didn't have time to do anything else, but I'm about to start drawing some pine cones. I am going to use graphite and coloured pencils, then use our colour copier to reproduce the cone detail. I will then collage in between the two other elements. I will need to do some accurate cutting, but I want an almost photographic quality and I think the photocopied look will help with that. So time to stop typing and start drawing!

Tuesday 7 September 2010

A day of drawing!

We spent most of today drawing with different materials and using different techniques. I'm so glad the evening class I did prepared me for this. It felt familiar and it was good to spend the time practising my drawing again. We also did some stuff that was new to me, and that's been good for me too. Always good to be pushed out your comfort zone, which for me is an ordinary 2B pencil!
Stipling technique using a Sharpie marker
Cross hatching using a fine line pen
Not a fantastic photo, but these were done with ink and a stick!

Using a sketching stick (like pastel) and colour pencil - a combination I've never tried but like!


Colour pencil - just nicely in my comfort zone!


We also did lots of quick pencil sketches, using both hands, and looking only at the object, or not looking at the object etc. They haven't photographed well so I won't bother putting them up here. No homework, but we were told to personalise our sketch books, so I decorated mine when I got home. (See below!)


Hooray for glittery pens!

More hat pictures


This is the side view of my hat. I wanted to do the 3D, pop up style work that I hadn't been able to do in my sketch book due to lack of time. On the top of the bonnet - called the Cat Flap Hat! - are a cat flap shape cut out, a cat profile, an armchair and a food bowl. I also added ears and whiskers, as I have seen various hats and hoodies with cats ears in the North Laines in Brighton.
Here you can see through the cat flap and see the cat and armchair. We weren't really supposed to draw but I did!

First week is over!


Sorry, you will need to tip your head to the left to see the photo properly! So what did we do on our first day? Aside from all the usual going through handouts of where everything is etc we made hats! We had a piece of A1 cartridge paper and as much masking tape as we wanted! (Hooray! I'm so used to stuff like tha being rationed as part of the challenge!) We had to make a hat that relfected us, or the work from our summer sketch books. My hat was bonnet shaped and was just crying out for some Amish style pleating at the back. The butterflies were a late addition, based on the black butterflies I saw at the Brighton Pavillion art installation over the summer.

Sunday 5 September 2010

Course starts tomorrow

Final post for today - I've put up most of the work in my sketch book, which I'm taking in to college tomorrow. I'm feeling quite nervous, but I'm sure Tuesday will be easier. I will try and post again either tomorrow or Tuesday with how I've got on!

Fibroduck

Now this painting has already been recieved with great critical acclaim! It's an acrylic - using Steinlen inspired colours and features a fibroduck (See http://www.fibroduck.com/ to find out about these!) I posted it onto the Fibroduck website and got lots of lovely positive comments - people are so kind and supportive! I'm quite please with it - I tried to paint more loosely this time and although Nelson's face is a funny shape I'm pleased with the result.

Wild Cousins

The BBC Wildlife magazine for August had some amazing photos of a Scottish Wildcat - really out on location Simon King style! So I have a got at doing some pictures of them, copying the photos in the magazine obviously - there aren't too many wild cats round here!
This is an acrylic painting, and I'm really pleased with the fur. I feel like I'm getting better at blending the acrylic paint now, and at adding the details.

This is a mixed media picture - the background is watercolour and I've added detail with oil pastels. I'm pleased with the cat's patterning, and the foilage on the left of the picture. The right hand side I'm less happy with, it's not quite how I wanted it. I think when working with photos you sometimes need to apply some artistic license and I guess as I get more confident as an artist that will get easier.

Secure Locations


Of all the pictures I've done of Nelson I think I am most pleased with this one. It shows him hiding on top of the kitchen cupboards, and catches his character well - the cheeky look and the 'aren't I gorgeous?' posing! I've done this with a mixture of graphite pencil and coloured pencil which works well, despite Nelson being black, which does lessen the contrast than if he was a ginger cat for example.

Favourite places and forbidden places

Here are two pictures of Nelson enjoying a favourite place and a forbidden place! He loves to sit here, curled up under the lower branches of a clematis - he fits so perfectly too! I drew this using the grid method, scaling up a photo. Unfortunately I ruled the lines on the photo, on top of this sheet so when I coloured with the colouring pencils I've ended up with a grid on the picture. Another useful lesson learned!

From a favourite place to a forbidden place! Due to Adrian having a slight cat hair allergy Nelson is not allowed on our bed. In our old house this was much easier to prevent, but occassionally here he sneaks in and has to be shooed out! When it was just me and Nelson he was allowed to sleep on the bed in the day, but not at night. Being woken by a cat breathing cat food breath all over you at 3am is not my idea of fun! This is a pastel pencil drawing - and I'm pleased with the fabric of the duvet cover. The photo I was working with just showed Nelson as a black blob so it was rather hard to draw him with any depth. The paper had a lot of texture to, hence the spotty look all over Nelson!

Collage


This collage was made using pages out the Argus, local newspaper. There are so many ads for lost cats, cats homes and rescue centres. There are lots of animals out there who have lost their location or have no location to call home. So to provide the contrast with all the pictures of my cat enjoying being 'on location' at home, I wanted to highlight the plight of homeless animals too.

Friday 3 September 2010

Comments

I'm (mostly) happy to receive comments about my art work. I think I've set the blog so I can moderate comments before they're published, so if you want to comment please do.

Cartoons that did work.

Ok, so I tried to draw a cartoon cat that did work, and I'm pleased with this one. It's drawn very much to a formula, from my How to draw Manga book, but I'm still pleased with it.
And to keep with the Japanese animation theme, how could I do a project about cats, without Hello Kitty? During my research I found a Hello Kitty lunch, including a Kitty made of rice and decorated with vegs to make the face! So here's my homage to Hello Kitty. I used pictures off the internet and stuck them on a paper collage background. It was like being a kid again, with one of thos sticker books, where you spend hours trying to decide where to put everything. Great fun!

Cartoon disaster.

I think it's good to show the stuff that just hasn't worked. I liked the idea of illustrating cat sayings, like cat nap, or the cat that got the cream. So I tried, and it did not work at all! I'm not happy with the drawings, they are far too child like, and I mean that in a bad way. They don't have the charm that I wanted, they just look a bit naff!